You're probably reading this with your bouquet still nearby. Perhaps it's resting in a vase on the kitchen table, ribbon slightly loosened, petals still carrying the shape of the day. After a wedding in a place with history and atmosphere, flowers can feel like more than décor. They become part of the memory itself.
That's why drying wedding bouquets deserves a little care and a little realism. Some methods give you a soft, antique finish that suits an old-world celebration beautifully. Others aim to hold more of the original colour and shape. The right choice depends less on trends and more on what you want to keep: the exact look, the mood, or the sentiment alone.
First Steps to Preserve Your Bouquet After the Wedding
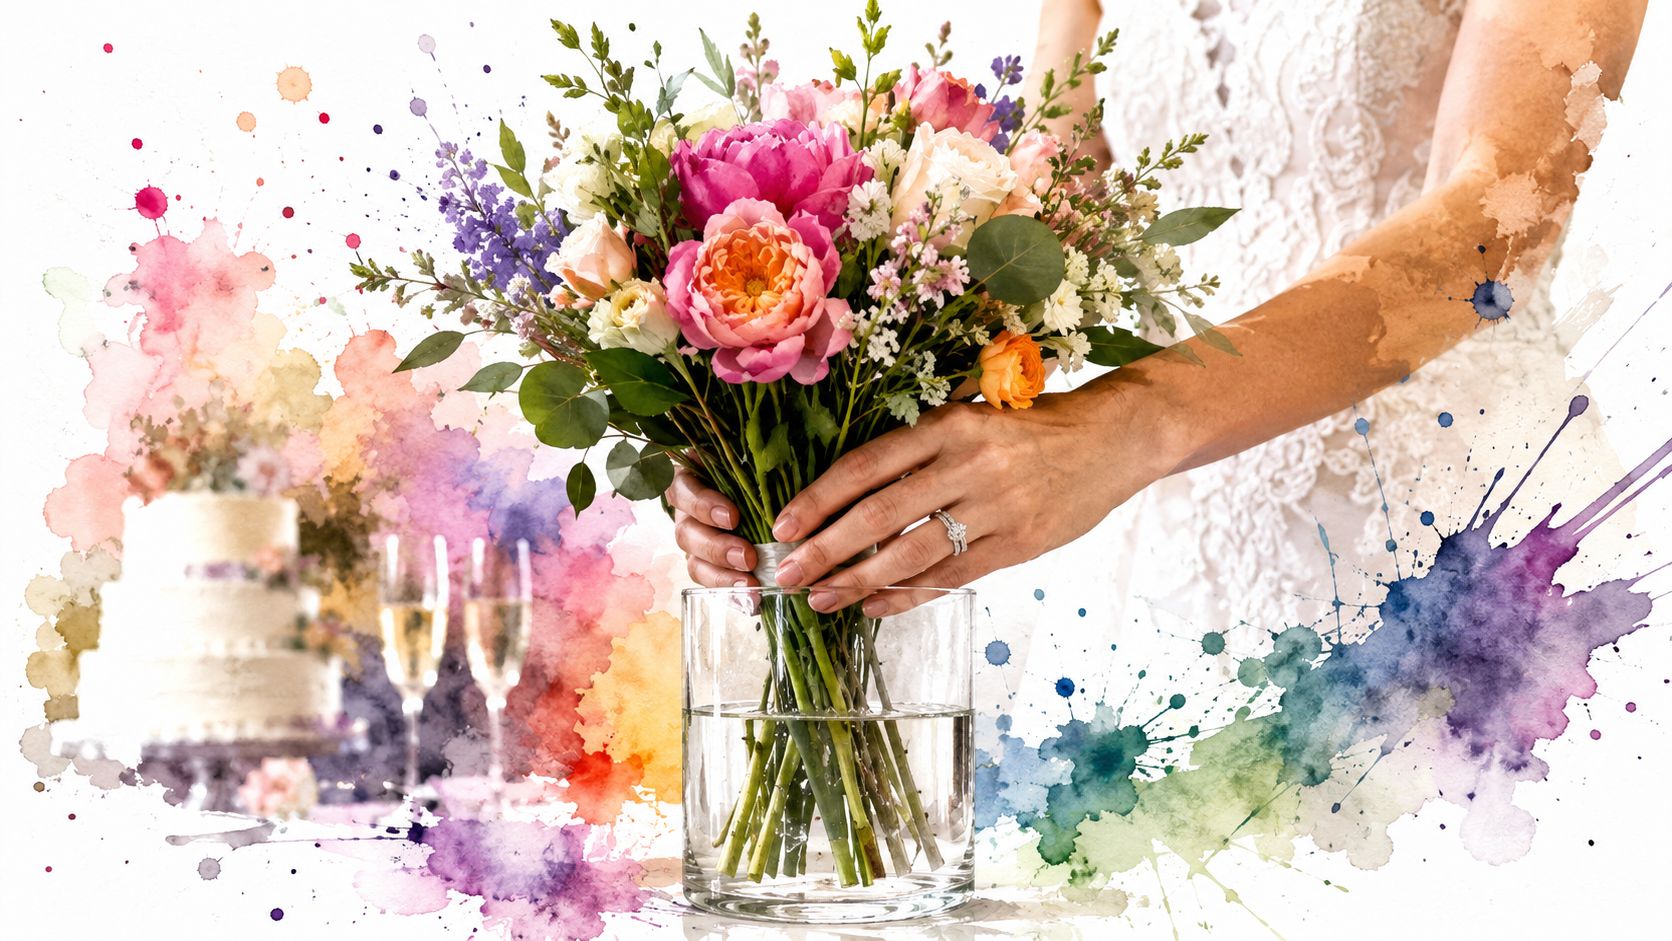
The morning after the wedding often decides what your bouquet becomes. Leave it wrapped on a warm table and it starts to soften, bruise, and hold moisture in all the wrong places. Treat it well in those first hours, and you give yourself a far better chance of turning it into an heirloom that still feels connected to the day.
What to do when you get home
Start by taking off anything that traps dampness around the stems. Loose ribbon can stay for the moment, but plastic wrap, wet tissue, elastic bands, and floristry tape should come away. A bouquet can still look beautiful on the outside while the centre is already sweating.
Then give the flowers a short rest in clean, cool water. This is a recovery stage, not the preservation itself. After a full day of photos, hugs, travel, and changing temperatures, many bouquets benefit from a few quiet hours upright in a vase. If the stem ends look dry or browned, trim a small piece off with clean scissors or secateurs first.
If you are still planning your wedding flowers, it helps to choose blooms with preservation in mind. Looking through floral wedding package ideas can help you spot bouquet shapes and flower types that dry more gracefully than others.
Your first 24-hour checklist
- Remove damaged parts: Take away bruised petals, torn outer petals, and foliage that has already gone limp or yellow.
- Open up the centre slightly: Dense hand-tied bouquets often hide crushed stems and pockets of moisture.
- Keep the bouquet upright: A clean vase with fresh water helps it recover its shape before you begin preserving it.
- Choose a cool spot: A shaded room is far better than a sunny sill, bathroom, or heated kitchen.
- Make a decision quickly: The fresher the bouquet, the better the finished keepsake usually looks.
I often tell couples not to judge the bouquet from the front alone. Roses, peonies, and hydrangeas can still look lovely in photographs the next morning, while the back of the bouquet is already collapsing. That matters because preservation keeps flaws as faithfully as beauty.
What not to do
Do not leave the bouquet in a car overnight. Do not set it beside a radiator. Do not spray it heavily and hope extra moisture will help.
One more practical point. You do not need to preserve every stem to honour the bouquet. In many cases, saving the best roses, ranunculus, or sprigs of scent from the arrangement gives a more beautiful result than trying to keep the whole hand-tie intact. That is often the difference between a wilted souvenir and a timeless piece you will still want to display years from now.
Choosing Your Bouquet Preservation Method
The method you choose shapes the memory you keep.
At Battle Abbey, I often see couples drawn to preservation because they want more than a dried bunch of flowers. They want a piece of the day itself. The right approach depends on what you hope to display years from now. A softly faded heirloom with a historic feel. A set of blooms that still hold much of their colour. Or pressed flowers turned into framed art for a hallway or bedroom.
Start with the finish, not the process. That usually leads to a better result.
Choose the look you want to live with
Air-drying suits couples who love age, texture, and romance. The bouquet will change. Colours soften, petals curl, and the whole arrangement takes on the feel of something collected and cherished over time. In a period home, or anywhere with a classic, layered style, that can look beautiful.
Silica gel suits couples who want flowers to stay closer to their wedding-day appearance. It asks for more care and a gentler hand, but it usually rewards that effort with better shape and stronger colour.
Pressing creates something else entirely. It preserves the flowers as artwork rather than as a bouquet. That can be the loveliest option if you already know you want a frame, album, or keepsake box rather than a vase display.
If you are still planning the flowers themselves, looking through floral wedding packages for weddings can help you spot bouquet styles that will suit the kind of keepsake you want later.
DIY Bouquet Preservation Method Comparison
| Method | Best For | Final Look | Time Required | Difficulty |
|---|---|---|---|---|
| Air-drying | Whole bouquets, looser hand-ties, sentimental keepsakes | Muted, vintage, softly faded | Several weeks | Low to moderate |
| Silica gel | Individual blooms, colour-focused keepsakes, flowers with delicate form | Brighter, more defined, closer to fresh | Usually faster than air-drying | Moderate |
| Pressing | Flat art, framed petals, stationery pieces | Botanical, delicate, two-dimensional | Varies by flower and setup | Low |
What tends to work best
Air-drying is often the most forgiving choice for couples who want atmosphere more than accuracy. It suits roses, lavender, statice, and other flowers that still look graceful once they have dried and darkened a little. It is less convincing if your goal is to recreate the bouquet exactly as it looked on the day.
Silica gel works best if you are comfortable taking the bouquet apart. That is the trade-off. You lose the hand-tied arrangement, but you gain a better chance of preserving the individual flowers in a way that still feels vivid and polished.
Pressing works beautifully for petals, smaller flowers, and meaningful stems you want to turn into art. It rarely satisfies couples hoping to keep the bouquet in its original shape.
Dense, moisture-heavy blooms can be unpredictable in any DIY method. Hydrangeas, peonies, and very full garden roses may dry beautifully, or they may brown at the edges and collapse through the centre. If the bouquet included expensive statement flowers, or if you know you will be upset by trial and error, professional preservation is often the kinder choice.
The Classic Air-Drying Method for a Timeless Look
The morning after a wedding at somewhere like Battle Abbey, the bouquet often looks almost untouched for a few brief hours. That is the moment to decide what kind of heirloom you want to make from it. Air-drying keeps the romance of the arrangement itself, with softer colour, more texture, and the kind of faded beauty that suits a historic setting beautifully.

How to prepare the bouquet properly
Air-drying works best when you treat the bouquet gently, but not too sentimentally. A large hand-tied arrangement usually needs dividing before it hangs. Smaller bunches dry more evenly and are less likely to trap moisture in the middle, which is where browning and mildew usually start.
For most bouquets, split the stems into a few loose bundles. Remove extra foliage first, especially any leaves low on the stems. They hold moisture and slow everything down. I also recommend taking away any petals that are already bruised or translucent, because they rarely recover and can spoil the finish of the flowers around them.
Tie each bundle with string, twine, or a soft elastic tie. Keep it snug enough to hold the stems together as they shrink, but not so tight that you flatten the shape.
Where to hang it
Choose a room that is dry, shaded, and well ventilated. A spare bedroom, utility room, or airing cupboard can work well if the space stays clean and fairly stable. Garages and basements are more risky because damp air and temperature swings make drying slower and less predictable.
Good airflow matters.
Hang each bundle upside down with enough space around it so the flowers are not pressed against a wall or crowding each other. Darkness helps preserve what colour remains, but dryness is the main priority. If the room feels humid or musty, pick somewhere else.
The bouquets that dry best are kept in clean, dry air and left alone.
This visual guide can help if you prefer to see the setup before starting:
What to expect during drying
Air-drying asks for patience. Many bouquets need a few weeks, and larger or more moisture-rich flowers can take longer. The stems should feel firm, and the petals should feel papery rather than cool or supple before you consider them finished.
The final look is the reason couples choose this method. Cream flowers often turn warmer. Blush tones usually soften. Deeper colours can become richer and moodier. If your aim is a bouquet that feels like a treasured object from the day, rather than a perfect copy of it, that change is part of its charm.
This method suits couples who want something timeless on a shelf, in a shadow box, or under glass. It gives you the poetry of the original bouquet, with all the softness of memory still attached.
Using Silica Gel to Keep Your Wedding Flowers Vibrant
The morning after a wedding at Battle Abbey, a bouquet can still look almost alive. If you want to keep that fresher, brighter look rather than the softened, antique finish of air-drying, silica gel is usually the better method.
Understanding silica gel
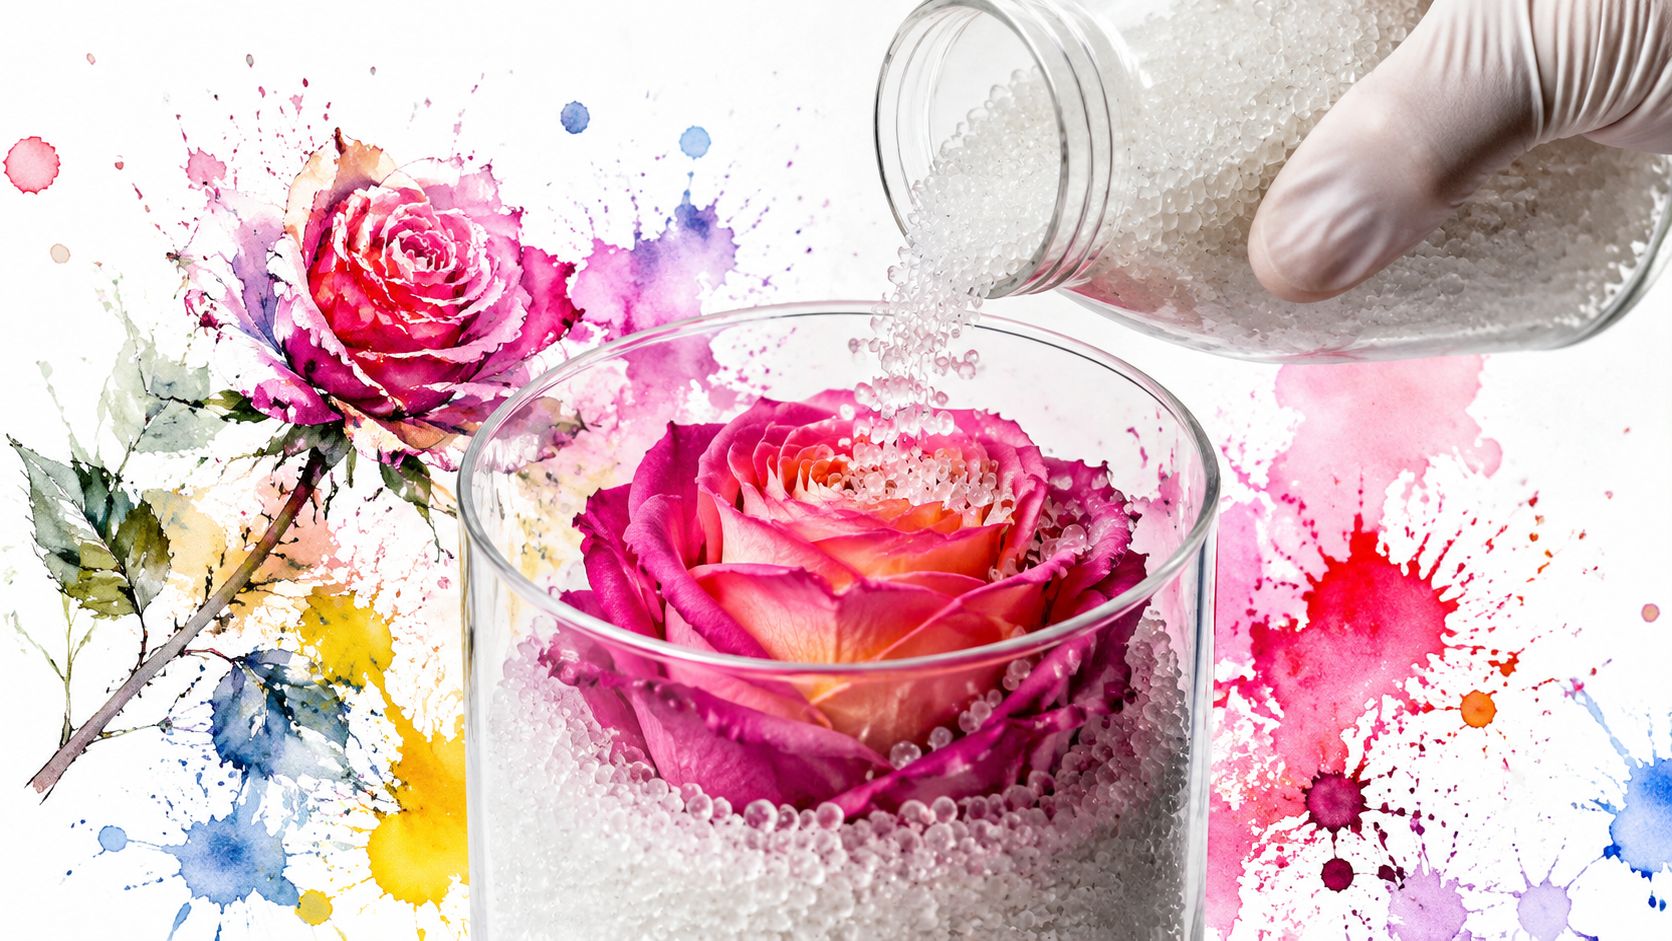
For bouquet preservation, silica gel means the drying crystals made for crafts and flower work. Use the loose crystals sold in tubs or bags, not the small packets packed with shoes or handbags. The right product pulls moisture out of the petals while supporting their shape, which is why it suits couples who want an heirloom that looks closer to the bouquet they carried.
You will also need a container with a tight-fitting lid and enough depth for each bloom to sit without being squeezed. I recommend preserving the best individual flowers rather than trying to sink the whole hand-tied bouquet. Silica gel excels with statement roses, ranunculus, peonies once they have opened, and any bloom you may later frame or use in a keepsake piece.
How to use it without flattening the petals
Start by trimming the stem to a short length. Pour a base layer of crystals into the container, settle the flower upright, then add more silica gel slowly around the outside of the bloom. Use a spoon and work into the gaps petal by petal. That support is what helps the flower dry in a natural shape instead of collapsing in on itself.
A few habits improve the result:
- Pick flowers in their prime: Bruised or browning blooms rarely dry beautifully.
- Handle one bloom at a time: It is slower, but far safer for delicate petals.
- Keep the container fully sealed: Any moisture that gets back in can mark the petals.
- Check progress carefully: Lift crystals away gently rather than tugging the flower free.
Drying time depends on the flower and how full the bloom is, but silica gel is usually much quicker than hanging a bouquet for weeks. Check too early and the petals can still feel cool or soft. Leave flowers buried far too long and some can become brittle. That balance is the trade-off.
When silica gel is worth the effort
Choose silica gel if your goal is colour retention, cleaner petal edges, and a finish that feels closer to the wedding day itself. It suits couples who want to build a shadow box, preserve a few hero flowers from the bouquet, or turn selected blooms into smaller romantic keepsakes. If you are already saving floral details from the celebration, a few preserved stems can also pair beautifully with ideas like a fresh flower crown for bridal portraits or a flower crown keepsake.
It is more hands-on than air-drying, and it works best in stages. But for vibrant flowers with sentimental value, that extra care often gives the more polished heirloom.
For couples who love the idea of lasting floral keepsakes in other forms too, Luxury everlasting rose gifts can offer useful inspiration.
Creative Ways to Display Your Preserved Bouquet
Once the flowers are dry, the question changes. It's no longer about preservation. It's about presence. A bouquet shouldn't end up forgotten in a cupboard after all that care.
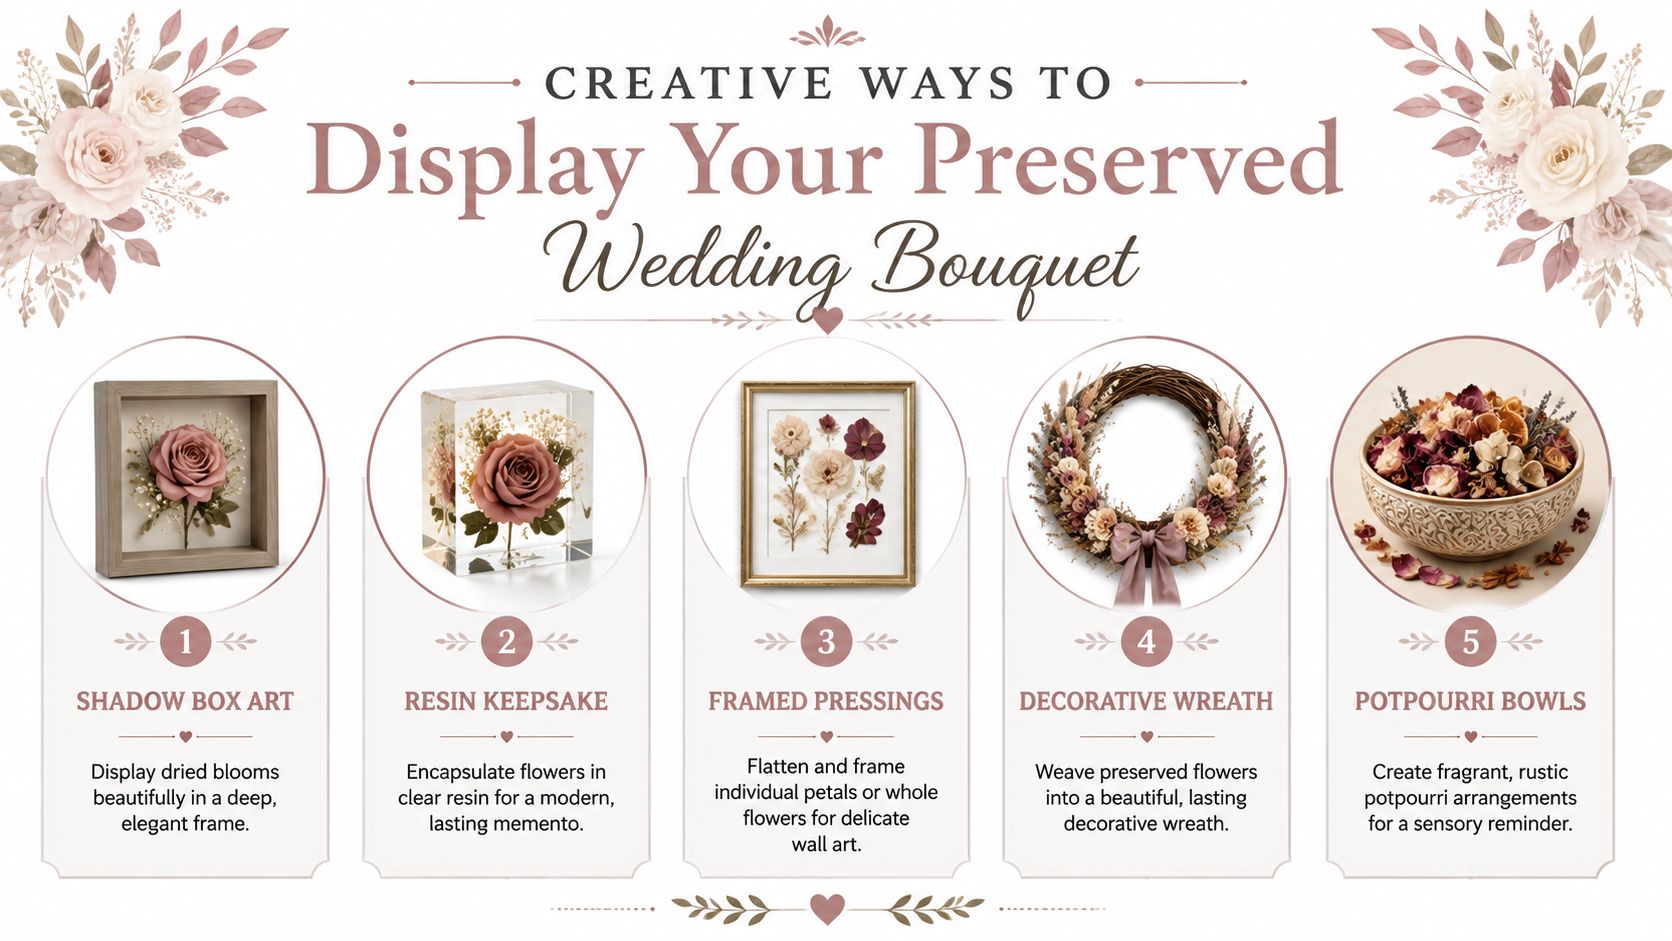
Keepsakes that suit different homes
A shadow box is one of the most elegant ways to display dried flowers. It protects the arrangement, gives depth, and works especially well if you want to include ribbon, a handwritten note, or a buttonhole from the day.
A glass cloche feels more decorative and a little more old-world. It suits a mantelpiece, dressing table, or shelf where the bouquet can be viewed from all sides.
Pressed flowers lend themselves to framed art. If you like a cleaner, lighter interior style, this often looks more considered than trying to keep a full bouquet on display.
Resin is another option for selected blooms. Rather than preserving the whole arrangement, many couples preserve a few meaningful flowers as a block, tray, or small object they can use or display every day.
For readers who love lasting floral keepsakes beyond the bouquet itself, Luxury everlasting rose gifts can offer useful inspiration for how preserved flowers sit within home décor without feeling overly formal.
A few charming display ideas
- Shadow box art: Best for a complete story of the bouquet.
- Framed pressings: Ideal for hallways, bedrooms, or gallery walls.
- Decorative wreath: Lovely for country homes and seasonal styling.
- Potpourri bowl accents: Better for petals than statement blooms.
- Resin keepsakes: A good choice for modern interiors.
If your wedding flowers also included wearable florals, these ideas for making a flower crown can spark creative ways to preserve smaller blooms separately from the bridal bouquet.
DIY Preservation vs Professional Services
The morning after the wedding is usually when this decision becomes real. The bouquet is still beautiful, but the petals have started to relax, and every hour affects the result. Couples who married somewhere storied and atmospheric, such as Battle Abbey, often want more than a craft project here. They want an heirloom that keeps a little of that setting and feeling alive at home.
When DIY makes sense
DIY preservation suits couples who are happy to trade precision for personality. It works well if you like a softer, timeworn finish and can accept that colour will mute, petals may curl, and the bouquet may settle into a more antique shape than it had on the day.
That is not a flaw. For many bouquets, it is part of the charm.
I usually suggest DIY if the emotional value comes from preserving the bouquet with your own hands, not from keeping it looking exactly as it did at the ceremony. Air-drying and pressing can produce a keepsake with real romance, especially if you love a vintage look that feels at home in an older property or alongside framed wedding photographs.
DIY usually works best if:
- You prefer a faded, old-world aesthetic: Dried flowers often look softer and more nostalgic than fresh.
- Your bouquet includes hardier blooms: These cope better with handling and drying.
- You can start straight away: Delay is often what ruins a good preservation attempt.
- You do not mind some variation: No home method preserves every petal perfectly.
When a professional is the safer choice
Professional preservation earns its place when the goal is accuracy. If you want the bouquet to keep more of its original colour, shape, and fullness, specialist methods usually give a better result. Professional services often use freeze-drying and other controlled processes that are difficult to replicate at home, which is one reason 63% of couples want to preserve their bridal flowers, according to The Knot's guide to bouquet preservation.
This route makes particular sense for delicate flowers, tightly constructed bouquets, or designs with expensive focal blooms. If the arrangement was a major part of your wedding look, or it tied into the setting in a very specific way, I would treat it with more care. A garden-style bouquet meant to dry into something loose and romantic is one thing. A carefully balanced design you hope to remember almost exactly is another.
Professional help also removes pressure during the first few days of married life. If you are leaving for honeymoon, hosting a post-wedding brunch, or do not want one more job after an intense week, handing the bouquet over can be the wiser choice.
A simple decision test
Choose DIY if you would still love the bouquet after some colour shift and shape change, and if the process itself feels meaningful.
Choose professional preservation if you know those changes would disappoint you.
Cost often helps settle the question. If your flowers were a significant part of your design budget, it is sensible to weigh preservation against the original spend. This breakdown of how much wedding flowers cost can help you judge whether specialist preservation feels worthwhile. If you decide the memory matters more than keeping the actual stems, this guide to unique home art prints offers another thoughtful way to carry floral details from the day into your home.