You're probably staring at a festive table plan and thinking the same thing many couples do. The flowers are chosen, the stationery is nearly there, and the place settings still need one detail that feels thoughtful rather than off-the-shelf.
That's where make your own Christmas cracker kits come into their own. Done well, they're not a crafty afterthought. They become part of the tablescape, part of the guest experience, and often one of the details people remember because it feels personal in the hand.
For weddings, that distinction matters. A good cracker should look polished enough to sit beside elegant glassware and beautiful linens, but still carry a little wit, warmth, and surprise.
The Enduring Charm of a Personal Touch
A winter wedding has a natural sense of ceremony already. Candlelight softens the room, ribbon and foliage add depth, and guests arrive expecting a little theatre. A cracker fits that atmosphere beautifully, but only if it feels chosen for the occasion rather than bought in haste with the supermarket napkins.
The appeal is partly emotional and partly cultural. Christmas crackers were created in the 1840s by London confectioner Tom Smith, and they became established as a distinctly British festive tradition during the Victorian era, as noted by English Heritage's guide to Christmas crackers. At a wedding, that history gives them more weight than a novelty favour. They nod to English heritage while still leaving plenty of room for personality.
Why bespoke works better at a wedding
A generic cracker usually clashes with a carefully designed table. The metallic print is too bright, the gift inside feels flimsy, and the joke often lands with a thud. A bespoke cracker solves that problem because every visible and hidden part can support the mood of the day.
That might mean silk ribbon in the bridal palette, a hand-written name tag, or a joke that only makes sense if you know the couple well. It might mean replacing the usual trinket with something more considered, such as a miniature keepsake or a note tied to a shared memory.
Practical rule: If a cracker looks like it belongs on your table before it's opened, you've made the right design decisions.
For couples who want a clean, polished finish without commissioning entirely custom print, I often suggest adding discreet labels or seals. Simple make your own custom stickers can work well for monograms, crest-style motifs, table names, or a tiny wedding date placed at the seam or on a tag.
Small object, big impression
The nicest crackers don't shout for attention. They rest at each place setting and reward guests who notice detail.
That's why they work so well at refined celebrations. They carry humour, sentiment, and design in one object. They also encourage conversation among guests who may not know one another yet, which is invaluable at a wedding breakfast where different groups are meeting for the first time.
A well-made cracker doesn't feel like filler. It feels like hospitality.
Gathering Your Cracker Making Supplies
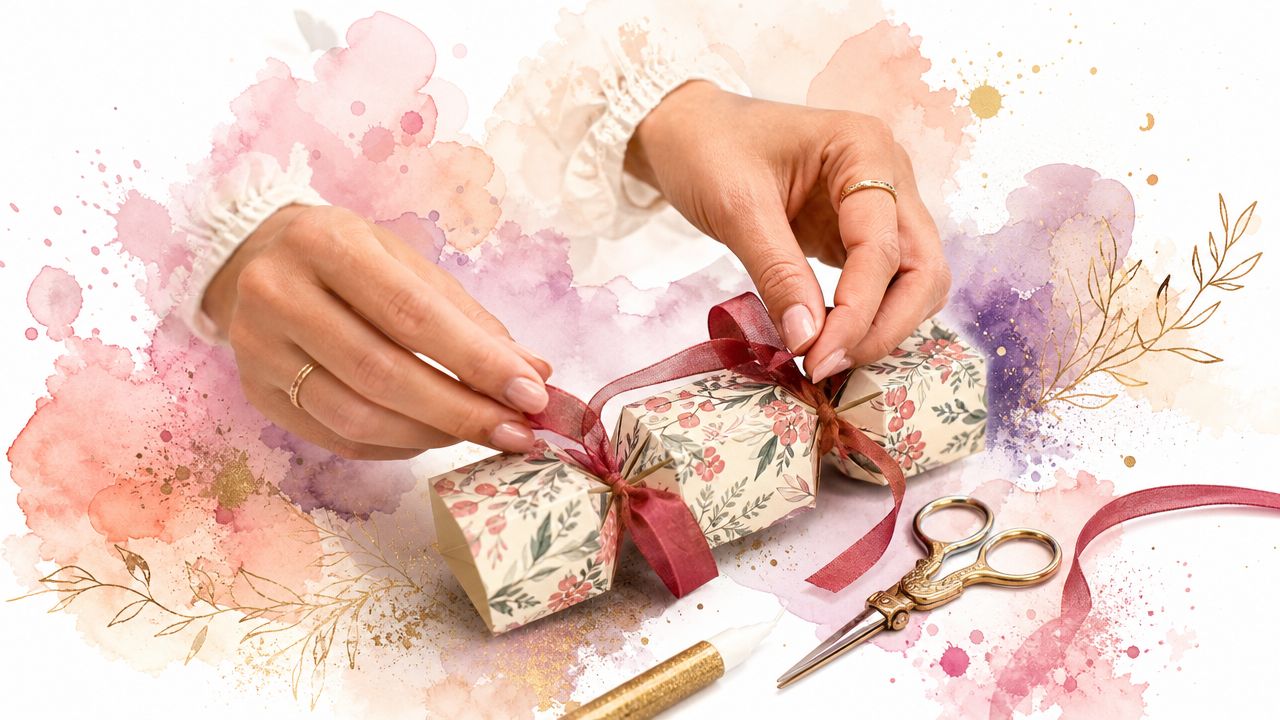
The difference between a charming DIY project and a frustrating one usually comes down to sourcing. If you start with a proper kit, you remove most of the fiddly guesswork and give yourself a dependable structure to build on.
Commercial kits from UK suppliers already reflect that all-in-one approach. Baker Ross lists core contents such as blank card templates, snaps, hats, jokes, ribbon, and instructions in its make your own Christmas cracker kits, which is exactly why kits suit wedding production better than trying to source every component separately.

The essentials
Think of the essentials as the engineering of the cracker. These are the pieces that make it function and hold its shape.
- Cracker templates or boards. These form the body. Pre-cut versions save time and give a more uniform result when you're making multiple crackers.
- Snaps. These create the pop. Without them, you have a favour shaped like a cracker rather than an authentic one.
- Paper hats and joke slips. If you want the full traditional experience, include both.
- Ribbon. This secures the ends and does a great deal of visual work, especially on wedding tables.
- Adhesive. Choose a glue that gives control. A messy seam will spoil even the most beautiful paper.
- Scissors and a clear work surface. Sounds basic, but neat cutting and clean assembly matter more than commonly anticipated.
If children are helping with a family Christmas project before the wedding season begins, it helps to keep a separate activity basket for them. Parents looking for calmer, hands-on ideas often enjoy collections of screen-free craft activities for kids, especially when the grown-up assembly line is in full swing nearby.
The embellishments that lift the finish
Once the structure is sorted, luxury lives in the details, transforming your cracker from homemade to bespoke.
Consider adding:
- Textured or heavyweight outer paper for a richer finish
- Velvet, satin, or metallic ribbon that matches your floral palette
- Wax seals for a heritage feel
- Handwritten name tags to double as place cards
- Pressed flowers or dried petals for a softer, romantic look
- Tiny charms that tie into the theme, such as stars, bells, or initials
Not every cracker needs all of these. In fact, restraint usually looks more expensive. One beautiful ribbon and a well-cut tag often outperform a pile of decorative extras.
Keep embellishment flat or lightweight wherever possible. The more bulk you add to the outer surface, the harder it is to keep a clean, balanced shape.
A simple sourcing test
Before you buy anything decorative, put each item through this question. Does it improve the cracker from across the table, or only when someone examines it up close?
If it only matters up close, use it sparingly. Wedding styling has to work at both distances. Guests should see harmony first, then discover the thoughtful details as they sit down and open each one.
The Art of Assembling the Perfect Cracker
The biggest leap in quality comes from technique, not decoration. Beautiful paper can't rescue a twisted roll, a messy glue seam, or a snap that refuses to fire.
For a reliable result, the fillable centre is typically about 2 inches in diameter by 4 inches long, according to the assembly guidance from Old English Crackers. That size matters because it limits what you can place inside. If the gift is too bulky, the barrel swells, the seam strains, and the whole cracker starts to look uneven.
Start with alignment, not glue
Lay everything out before you commit to assembly. That means your tube or barrel, outer paper, snap, ribbon, and filler all within reach.
The neatest crackers are rolled straight from the very first turn. If the tube isn't centred properly on the paper, one end will sit longer than the other and the finished cracker will look off, even if you can't immediately say why.
A repeatable workflow looks like this:
- Position the centre tube carefully so the paper is balanced on both sides.
- Secure any loose internal rollers first if your kit uses them.
- Apply a small line of glue at the starting edge, then a narrow bead along the opposite edge.
- Roll the paper tightly and evenly without tugging it off line.
- Remove any temporary rollers, then stiffen the ends before crimping.
That straight roll is the difference between a cracker that looks crisp in a styled place setting and one that feels soft and handmade in the wrong way.
Where many crackers go wrong
Most assembly mistakes are predictable. That's good news, because they're easy to prevent once you know what to watch.
- Glue migration. If glue squeezes out onto the outer surface, it marks the paper and weakens the finish. Keep the bead narrow and slightly inward if needed.
- Overfilling. The centre barrel isn't generous. Choose compact gifts and keep wrappers smooth.
- Soft ends. If the ends aren't stiffened before tying, they collapse and wrinkle.
- Poor snap placement. The snap should stay near the outer rim, not deep inside the cylinder, or it may not pop properly when pulled.
A luxury finish usually comes from precision that no guest consciously notices. Straight seams, even ties, and balanced proportions do the heavy lifting.
Tying and filling with a steadier hand
Crimp one end first and tie it with a ribbon measuring 10 to 12 inches, following the same Old English Crackers guidance noted above. Then add your chosen filler, hat, and message before closing the second side.
If you're including handwritten notes or delicate items, place them so they sit neatly within the barrel rather than bunching into one end. I also recommend testing one finished cracker before producing the full batch. Pull it. Open it. Check the seam, the snap, and the way the contents sit once released.
For couples adding other handcrafted details to the day, there's a similar balance between softness and structure in floral accessories such as flower crowns for weddings. The same principle applies. Romantic details still need underlying technique.
A visual demonstration can help if you're more confident learning by watching than reading.
What works at event scale
Single crackers are forgiving. Wedding quantities are not. If you're making dozens, standardise early.
Use the same ribbon length throughout. Keep all filler within the same size range. Pre-cut name tags. And don't switch glue halfway through the run unless you enjoy discovering that your final group dries with a different sheen or hold.
Consistency is what makes a full wedding table look intentional.
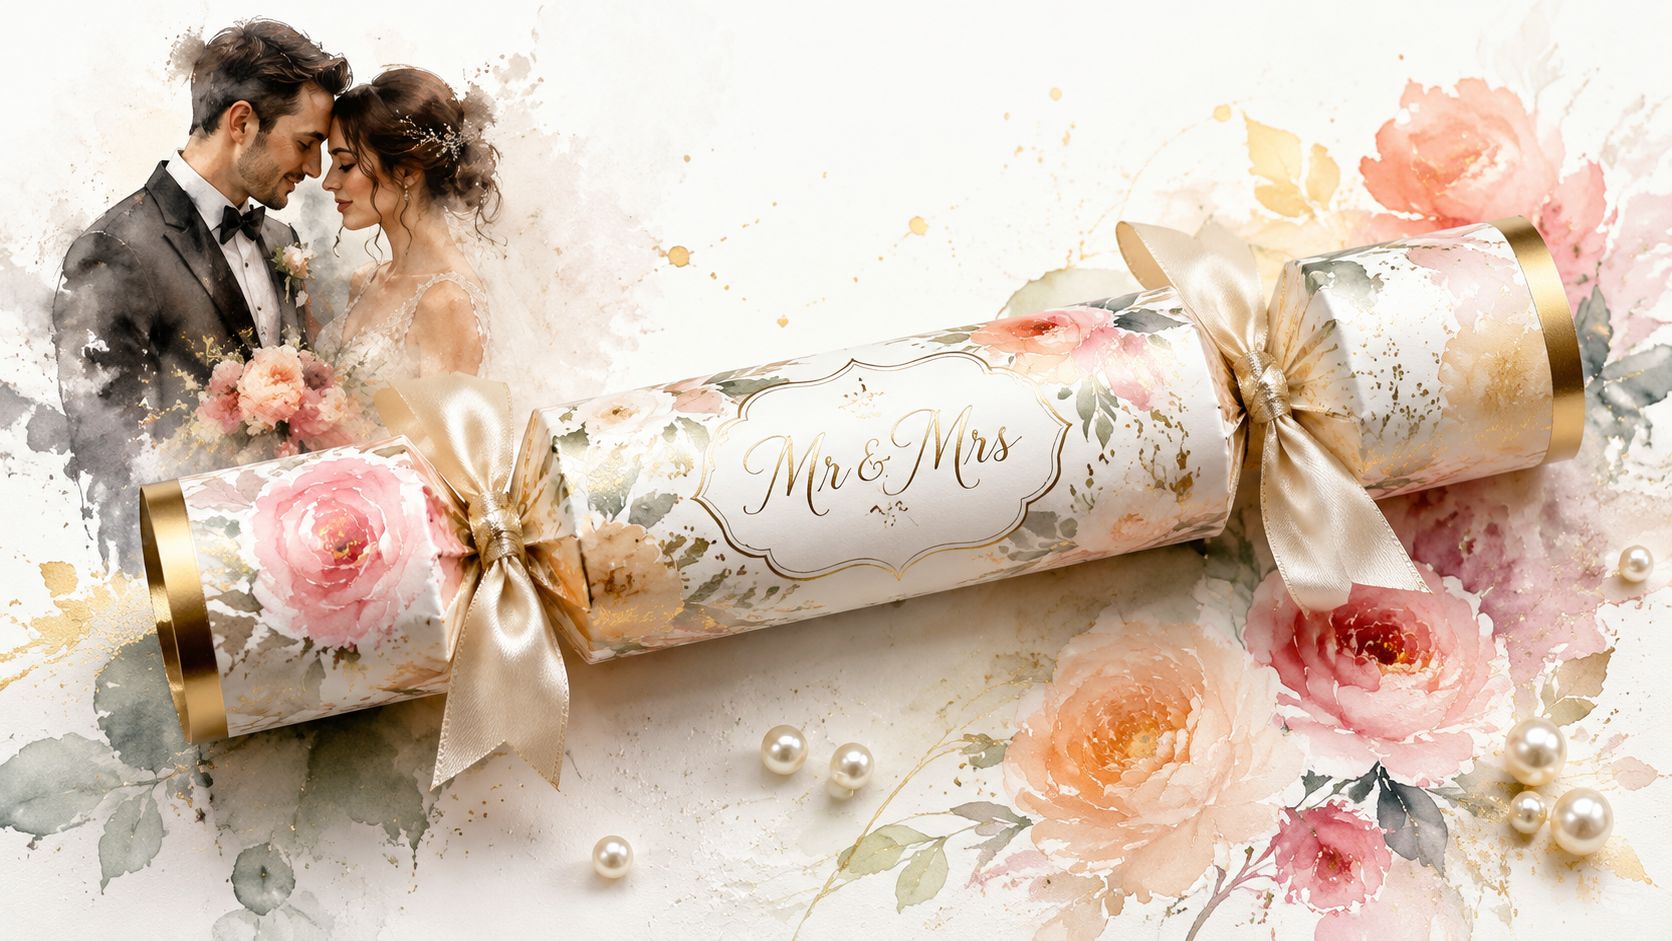
Personalising Crackers for a Wedding Theme
The best wedding crackers don't sit apart from the styling. They continue it. When guests find them at their place settings, they should feel like a natural extension of the table design rather than a festive novelty added at the last minute.
That's especially important when the setting itself has character. Historic venues, candlelit rooms, and winter florals call for materials with depth. Soft papers, restrained metallic details, and ribbon with a proper hand feel far more elegant than shiny mass-market finishes.
Let the table lead
Start by looking at the tablescape as a whole. If the flowers are muted and romantic, let the crackers echo that softness with watercolour florals, velvet ribbon, or a cream card stock with subtle gold detailing. If the room has darker timber, stone, or candlelight, deeper shades such as forest, claret, navy, or antique gold usually sit more comfortably than bright red.
A few combinations I've seen work beautifully are:
- Ivory paper with silk ribbon for formal winter weddings
- Botanical print with twine or satin for a softer countryside feel
- Deep jewel tones with brushed metallic accents for evening receptions
- Monogrammed tags and wax seals for heritage-inspired celebrations
The aim isn't to make the cracker the star of the table. It's to make it feel as though it belongs there so naturally that no one questions it.
Make the contents feel personal
This is where bespoke crackers earn their place. The outer design gets attention first, but the contents create the emotional response.
Some of the strongest ideas are simple:
- A private joke reworked into a cracker joke
- A small note thanking guests for travelling or supporting the couple
- Miniature favours chosen around shared memories
- Seed packets or garden-themed keepsakes for couples who love the outdoors
- Tiny local treats that connect the wedding to place
You don't need to fill every cracker with something elaborate. Guests respond far more warmly to relevance than to random novelty. One well-chosen item and a thoughtful message will always beat a handful of plastic pieces.
If you wouldn't choose the gift on its own, don't hide it inside a cracker and hope the ribbon saves it.
Place settings that do more than decorate
A personalised cracker can also solve practical styling needs. Add a guest name tag and it becomes a place card. Add a menu insert and it can become part of the stationery story. Coordinate the ribbon with bridesmaid dresses or florals and it helps tie the full room together.
For couples planning thank-you details beyond the table itself, thoughtful gifting often follows the same principle. Small items feel far more meaningful when they're chosen with care, whether they sit at a place setting or form part of your wedding party thank-you presents.
The most successful wedding crackers feel edited, not overloaded. They're customized enough to be memorable, but restrained enough to remain elegant.
Planning for Bulk Production and Assembly Parties
Making a handful of crackers is pleasant. Making enough for a wedding needs organisation.
The mistake most couples make is treating bulk production as a larger version of a small craft session. It isn't. Once you're producing for a guest list, the work needs batching, labelling, and a sequence that avoids rehandling each cracker too many times.
Build a simple production line
Set up your workspace in stations rather than piles. One area for outer wraps, one for rolling and gluing, one for tying, one for filling, and one for finished crackers.
That single change keeps momentum going. It also helps if friends or family are joining in, because each person can take on a clear task instead of everyone reaching for ribbon and scissors at once.
A practical order looks like this:
- Prep first. Cut tags, sort ribbons, group fillers, and stack papers before anyone starts assembling.
- Make one approved sample. Use it as your reference for every cracker after that.
- Batch the fiddly jobs. Tie all first ends together. Then fill. Then close second ends.
- Store by table or name range. That avoids last-minute sorting on the eve of the wedding.
If you're already thinking in terms of guest experience, menu flow, and table logistics, it helps to treat crackers like any other reception detail. The same planning mindset that goes into Christmas menu styling for events and restaurants also applies here. Repetition is easier when the system is clear.
Time and cost planning
Exact timings and costs vary too much by material choice and filler, so it's better to use a working estimate framework rather than pretend there's one universal figure.
| Number of Crackers | Estimated Assembly Time | Estimated Material Cost |
|---|---|---|
| Small wedding | Allow a relaxed evening session or two | Depends on kit quality, ribbon choice, filler, and printed extras |
| Medium wedding | Plan several batched sessions | Costs rise most noticeably with premium fillers and embellishments |
| Large wedding | Treat it like a mini production project | Budget carefully for decorative upgrades across every place setting |
Labelled as Estimated Time and Cost for DIY Cracker Production (2026), this kind of table is most useful as a planning lens, not a promise. The primary variable isn't usually the base kit. It's the ambition of the finish.
Host an assembly party that actually works
Assembly parties can be brilliant, but only if they're organised. If everyone arrives to an unsorted mountain of supplies, morale drops quickly.
Good assembly parties have three things:
- A host table already laid out with one finished sample in the centre
- Clear role allocation so nobody duplicates the same task
- A quality check point where one person keeps an eye on seam neatness, ribbon consistency, and filler placement
Keep refreshments simple. Protect the work surface. Don't mix open drinks with finished papers. And stop while everyone is still enjoying it rather than stretching the session until the final crackers become rushed and untidy.
A cheerful evening with bridesmaids, siblings, or parents can turn a practical task into a lovely pre-wedding memory. That's often part of the charm.
Your Cracker Questions Answered
Are cracker snaps safe to use?
They're designed for crackers, but they still need sensible handling. Store them dry, keep them with the rest of your organised materials rather than loose in a handbag or coat pocket, and keep children supervised during assembly. If anyone is helping in a group setting, explain how they're positioned before work begins so nobody forces or folds them incorrectly.
Can I take wedding crackers on a flight?
Always check with your airline and travel provider before packing them. Crackers with snaps can fall into a separate category from ordinary table décor, and rules can vary. For destination weddings, it's often easier to assemble them at the destination, or transport the decorative elements and source any regulated components locally.
What should I put inside if I want them to feel elegant?
Think compact, useful, and relevant to the couple. Miniature keepsakes, folded notes, small edible treats, tiny beauty items, or symbolic objects usually work better than novelty toys. Also remember the sustainability question. DIY kits still use multiple materials such as paper, cardboard tubes, snaps, ribbon, and fillings, as outlined in House Beautiful's guide to making your own Christmas crackers. That means the greener choice isn't automatically “DIY”. It depends on what you choose, how much packaging your fillers involve, and whether any decorative elements can be reused.
A smart rule is simple. If the item is lovely enough to keep, useful enough to eat or use, or personal enough to save, it belongs in a wedding cracker.
If you're planning a celebration with atmosphere, history, and room for thoughtful details, Battle Abbey Weddings offers a remarkable setting for a bespoke day. From intimate gatherings to larger receptions, it's the kind of venue where personal touches like beautifully made crackers don't just fit in, they help tell the story of the whole event.